How to treat raw transients after recording fresh foley sounds
Feb 16, 2022, 12:00:00 PM
First thing to understand is that raw sounds have very powerful spikes that make the sounds unusable if untreated properly. You can try it your self; take your mic, record some hand claps or two planks of wood colliding and try to use these raw sounds in a mixed and mastered track. What you'll soon realize is that these untreated sounds do not work as they should. What you'll mostly hear is the pure powerful transient and nothing else. We at Red Peak Audio value a good dynamic sound, but we have to think about the practicality as well, so how do you treat such a sound to get it into an usable state? There are several methods to do it, so let's take a look at them right now.
Equalizer
The first thing you should do is to try to analyze the sound, it's spectrum peaks and try to treat them in an equalizer. You can say, that Transient Designer plugin should be the first option, but you would be wrong. An equalizer can treat the resonant frequencies and unpleasant resonant peaks, which will result in more pleasant sounding transients, that would otherwise tear your ears off on a bigger sound system.
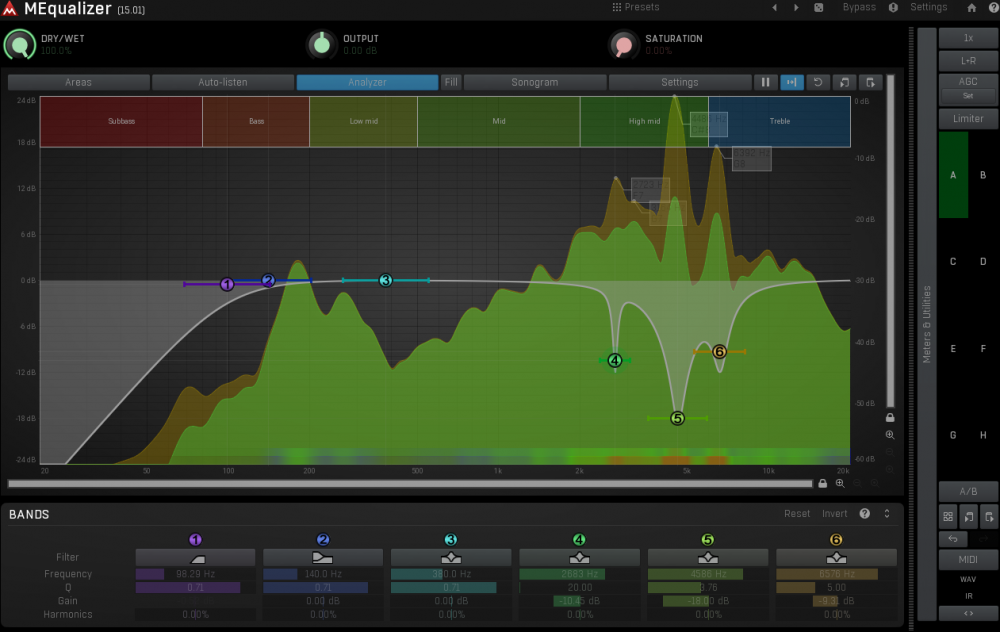
On the picture above, we're treating some of the most annoying resonant frequencies of a metal bottle sound. That alone softens the sound enough for us to make a better judgement in the later part of the plugin chain. You could say, that we're making pretty harsh adjustments, but bear in mind, that this is a sound prior of any kind of post production.
Of course, this alone often won't fix the sharpness issue, but it will
prepare your sound for the next stage.
Transient Designer
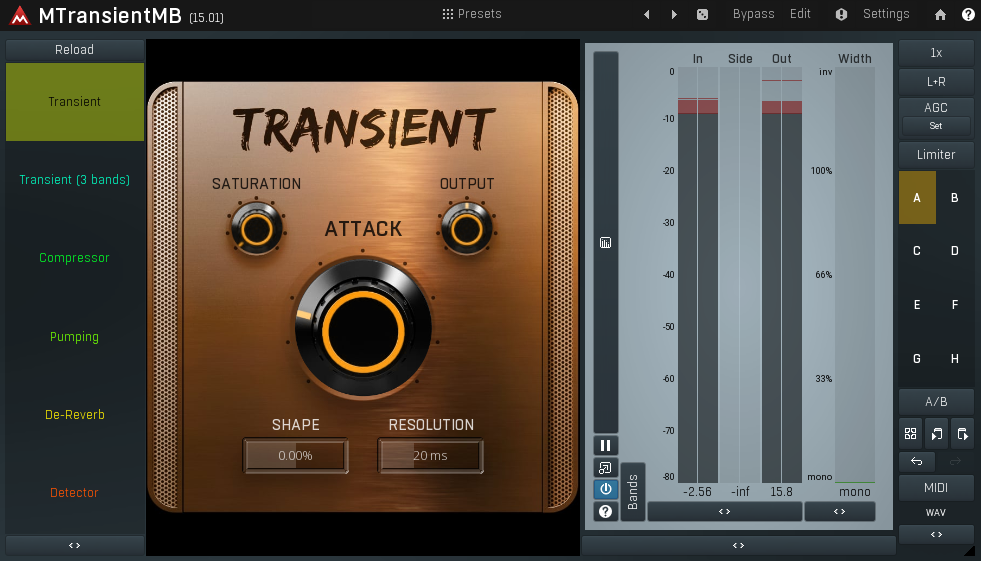
A good transient designer can tone down the sharpness of the sound to usable practical level. When recording foley sounds, it's rather rare to end up with a sound, that doesn't need any dynamic treatment. By reducing the transient loudness we can bring up the natural reverb/tail of the sound, making it fit into the target material and making it sound better in general. It makes no sense to make the rest of the sound go to waste. We want to mention Melda Production plugin – MTransientMB. It's extremely easy & fast to use. You can use the multiband mode to treat certain frequencies alone, it's super transparent, and you can engage insane level of oversampling. Usually, we find the default single band transient mode sufficient enough to work with, but if we need the extra control, this plugin delivers.
Saturation
Introducing
additional harmonics into your material is always a good idea if you do it
carefully and tastefully. Using saturation, to cut the spikes and
transforming them into additional harmonics, thus further enriching your sound
is a great step in the overall treatment. For this we would recommend the
SoftTube One Knob saturation plugin, Soundtoys Decapitator or MSaturationMB.
After applying saturation, you'll notice is that the rest of the sound after the initial
transient is now more present. You can think of this as a compression with benefits - those being the extra harmonics.
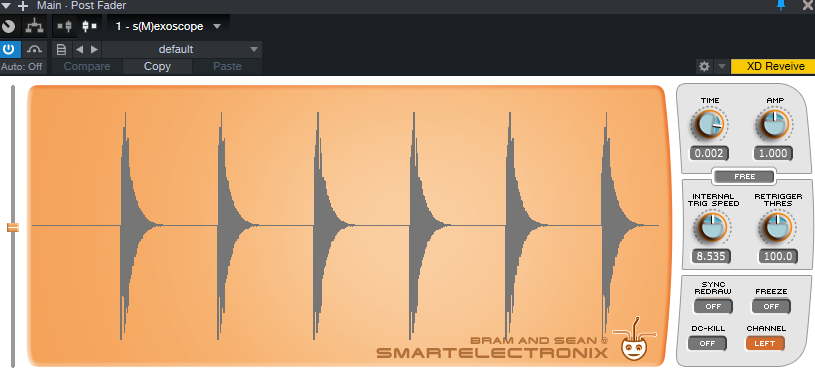
Here is a waveform without saturation:
And here it is with saturation:
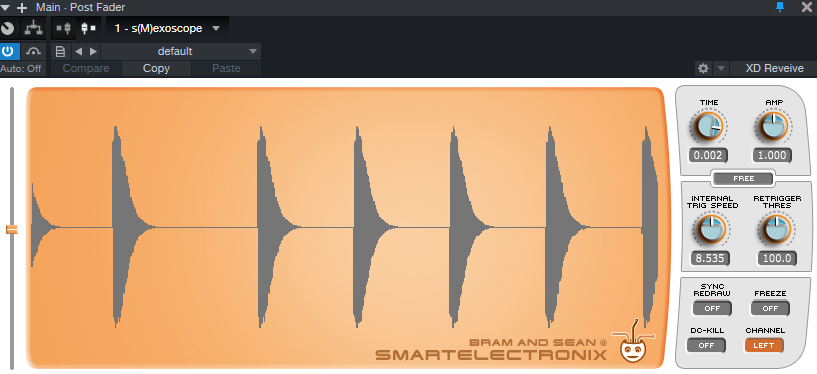
The sharp edges have been rounded up and the sound feels stronger and fuller. It's very important to keep in mind, that not every sound is suitable for all kinds of saturation. Some are better with clipping, others sound better with soft clipping and some aren't suitable for any saturation at all.
Multiband Compressor
We use a multiband compressors to treat the problematic spectrum only.
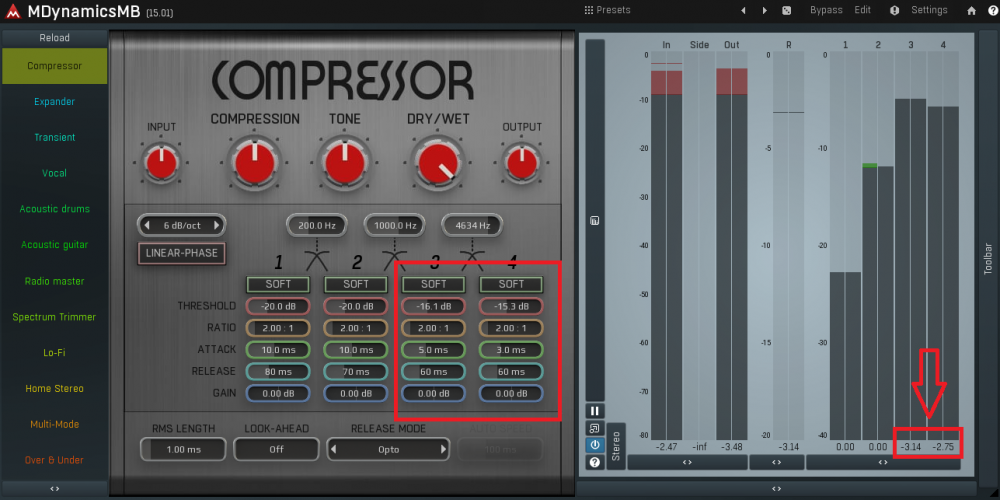
With very gentle spectrum
crossovers, low ratio, very fast attack and release, and –2 to –4 dB reduction,
we achieve a decent treatment in problematic areas. Generally we bring the signal back to it's original levels by turning up the make-up gain, but in this case here, we felt that the level reduction worked in the sound's favor in regards to overall balance.
Limiter
Where you put the plugins in the chain is up to you, but limiter should almost always be at the end of the plugin chain for obvious reasons. One thing the limiter does is it catches any unwanted peaks that could bleed over 0dB. Another reason to use limiter is to flatten the sound, further processing the sharp transients and blending it with the rest of the sound, making it more compact and usable in mixes. You should consider using more than one limiter per chain; one at the early stages of the plugin chain and one at the end, both taking just a little; around -2 to –4 dB. This way both plugins won't work as hard as they would by being alone.
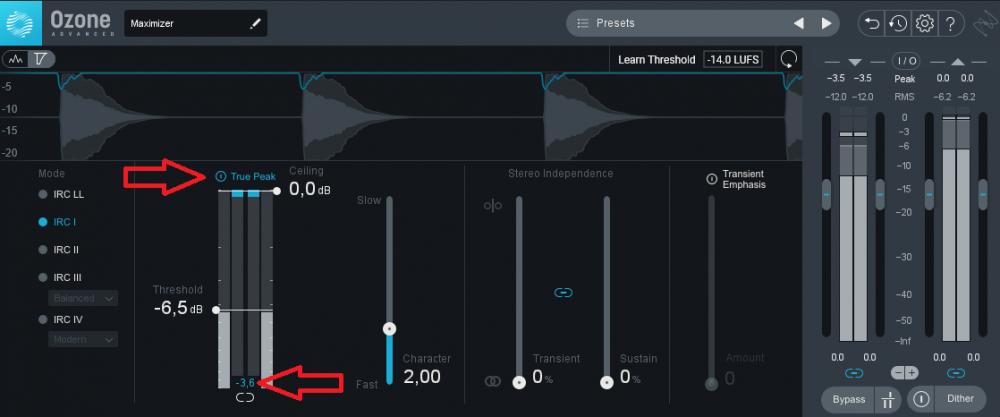
We recommend using the Ozone 9 Maximizer. It handles transients very well and it's insanely clean in terms of the sound and foldback distortion artifacts - they basically do not exist at all when you turn on "True Peak" mode, but even without TP turned on, the limiter is very clean.
Summary
The plugin order is always for a debate. It depends on the source material you're processing and on the context of the target you're trying to fit in. What's important to keep in mind is that everything you do in the chain adds up, so do not overdo it. You should always start with gentle settings and use them as the base for your judgement. If your ears and graphs tell you it needs more drastic measures, then go for it, but when you think you're done, ALWAYS test your work in a finished sound. For example, we test our samples in finished well mixed & mastered tracks in order for us to hear if they stick out like sore thumb or fit in. That way we can objectively judge, if we're doing a good job or not.
